Account and Team Management
The research portal is something teams use to collaborate, and managing your team’s access can be just as important as pulling data! This section will educate you on how to use our tool to accomplish just that!
If you are the admin of your organization, you have the power to grant & revoke access for members of your team. You also have the power to delete lists that your team members create. Currently, that’s the extent of what separates an admin from a normal member.
Your seat limits are dictated by the plan you chose when signing up. If you’re not sure what that limit is, or if you have any questions, feel free to send us an email to [email protected]
Personal Account
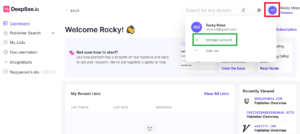
By clicking the bubble with your initials (boxed in red above) you are able to manage your account via the link boxed in green above titled “Manage account.” When you do that, a new modal window appears. From there, you can access common account features, specifically:
- Toggle your display name
- Update your e-mail address
- Update your password / log out other devices
- See active & recent sections
Team Management
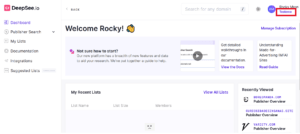
Clicking the name of your company, boxed in red in the above image, you can grant & revoke seats to your team members. Additionally, you can add company imagery & change the organization name.
Clicking that link will open up a new modal window, looking something like this:
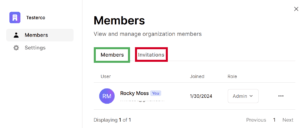
To invite a new user, click “Invitations,” boxed in red above.
If you have not invited anyone yet, your window will look something like this:
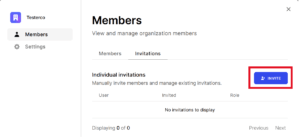
Click the “Invite” button, highlighted above, and you’ll be able to type in / copy multiple email addresses; you’ll also be able to assign these emails a role within the organization. As mentioned above, admins have the power to grant & revoke access for members of your team, and also have the power to delete lists that your team members create.
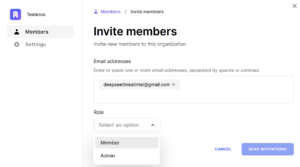
You can only invite one type of role at a time, but there are no restrictions on how many times you can do the invite process (outside of your seat limits). Once you type all the emails for each role on your team, hit “send invitation.”
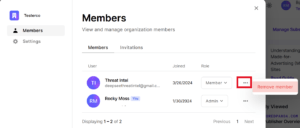
Once you do invite a team member, you’ll see them appear in the “Members” tab of this section. If you find you need to remove a member, simply click the ellipses to the right of their name (boxed in red below), and click “Remove Member.”
Finally, clicking the “Settings” option on the left side of that window allows you to upload a profile image and/or change the organization name.